Why Blurry Scanned Photos Happen
Physical photographs do degrade over time, but scan blur is often introduced during digitization rather than caused by the print itself. If the scan is soft from the start, every restoration tool has less detail to work with.
Blur usually comes from one of four sources: the original camera missed focus, the print moved slightly on the scanner bed, the photo was scanned at low DPI, or the exported file was compressed too aggressively. That is why people often search for how to fix blurry scanned photos when the real problem started with scanner settings.
Scratches and creases still matter, but they are secondary problems in this workflow. First get the cleanest scan possible. Then let AI deal with surface damage.
Scanner Mistakes That Cause Soft Restorations
Before you run any restoration workflow, make sure the blur is not being created by your scan workflow. These are the most common causes of soft or muddy scan results:
- Low DPI scans — Scanning at 150 or 300 DPI can leave too little detail for face recovery or fine scratch repair
- Scanner-bed movement — A print that shifts or curls slightly while scanning can create global softness
- Compressed exports — Small JPG exports throw away texture that the restoration model needs
- Dust on the glass — Dirt and lint can imitate scratches or reduce edge clarity
In practice, most weak restorations improve once the scan is straighter, cleaner, and exported with less compression.
How AI Fixes Blurry Scanned Photos and Surface Damage
Traditional photo repair required hours in Photoshop using clone stamps, healing brushes, and manual sharpening. AI restoration works better when the scan already contains enough detail, because it can sharpen faces, recover edges, and repair scratches from a stronger source image.
Here is what happens when you fix blurry scanned photos with an AI tool like PixRestorer:
- Deblur — The AI detects edges, textures, and facial features, then sharpens them while keeping the image natural
- Face enhancement — Portraits receive extra attention to recover eye detail, skin texture, and expression
- Edge recovery — The model restores local contrast so details look clearer without turning harsh or artificial
- Light cleanup — Minor marks and surface noise can be reduced as part of the same repair pass
The entire process takes under 30 seconds per photo. If the first result still looks soft, rescan the print with a cleaner, larger source file before spending time on manual retouching.
Step-by-Step Repair Workflow
Step 1: Upload Your Damaged Photo
Go to PixRestorer's restore tool and upload the photo you want to fix. JPG, PNG, and WEBP formats are supported.
Tip: If you are scanning a physical photo, aim for 600 DPI or higher before you upload. That gives the AI more detail to work with and usually produces better results when you fix blurry scanned photos.
Step 2: Let AI Analyze and Repair
Once uploaded, PixRestorer automatically detects blur, scratches, creases, tears, and fading. It runs multiple repair models in parallel:
- Sharpens blurry areas and faces
- Improves local contrast in soft details
- Reduces minor marks that make scans look muddy
- Corrects faded or shifted colors
Processing typically finishes in 20–40 seconds depending on file size and damage complexity.
Step 3: Preview, Compare, and Download
You will see a side-by-side before and after comparison. Zoom in to check facial details and scratch removal quality. If you are happy with the result, download the restored image in full resolution.
New users receive 2 free credits, so you can try the tool on two photos at no cost.
If the output improved but still looks soft, go back and refine your scan workflow instead of immediately over-editing the result.
Real restoration example from our community
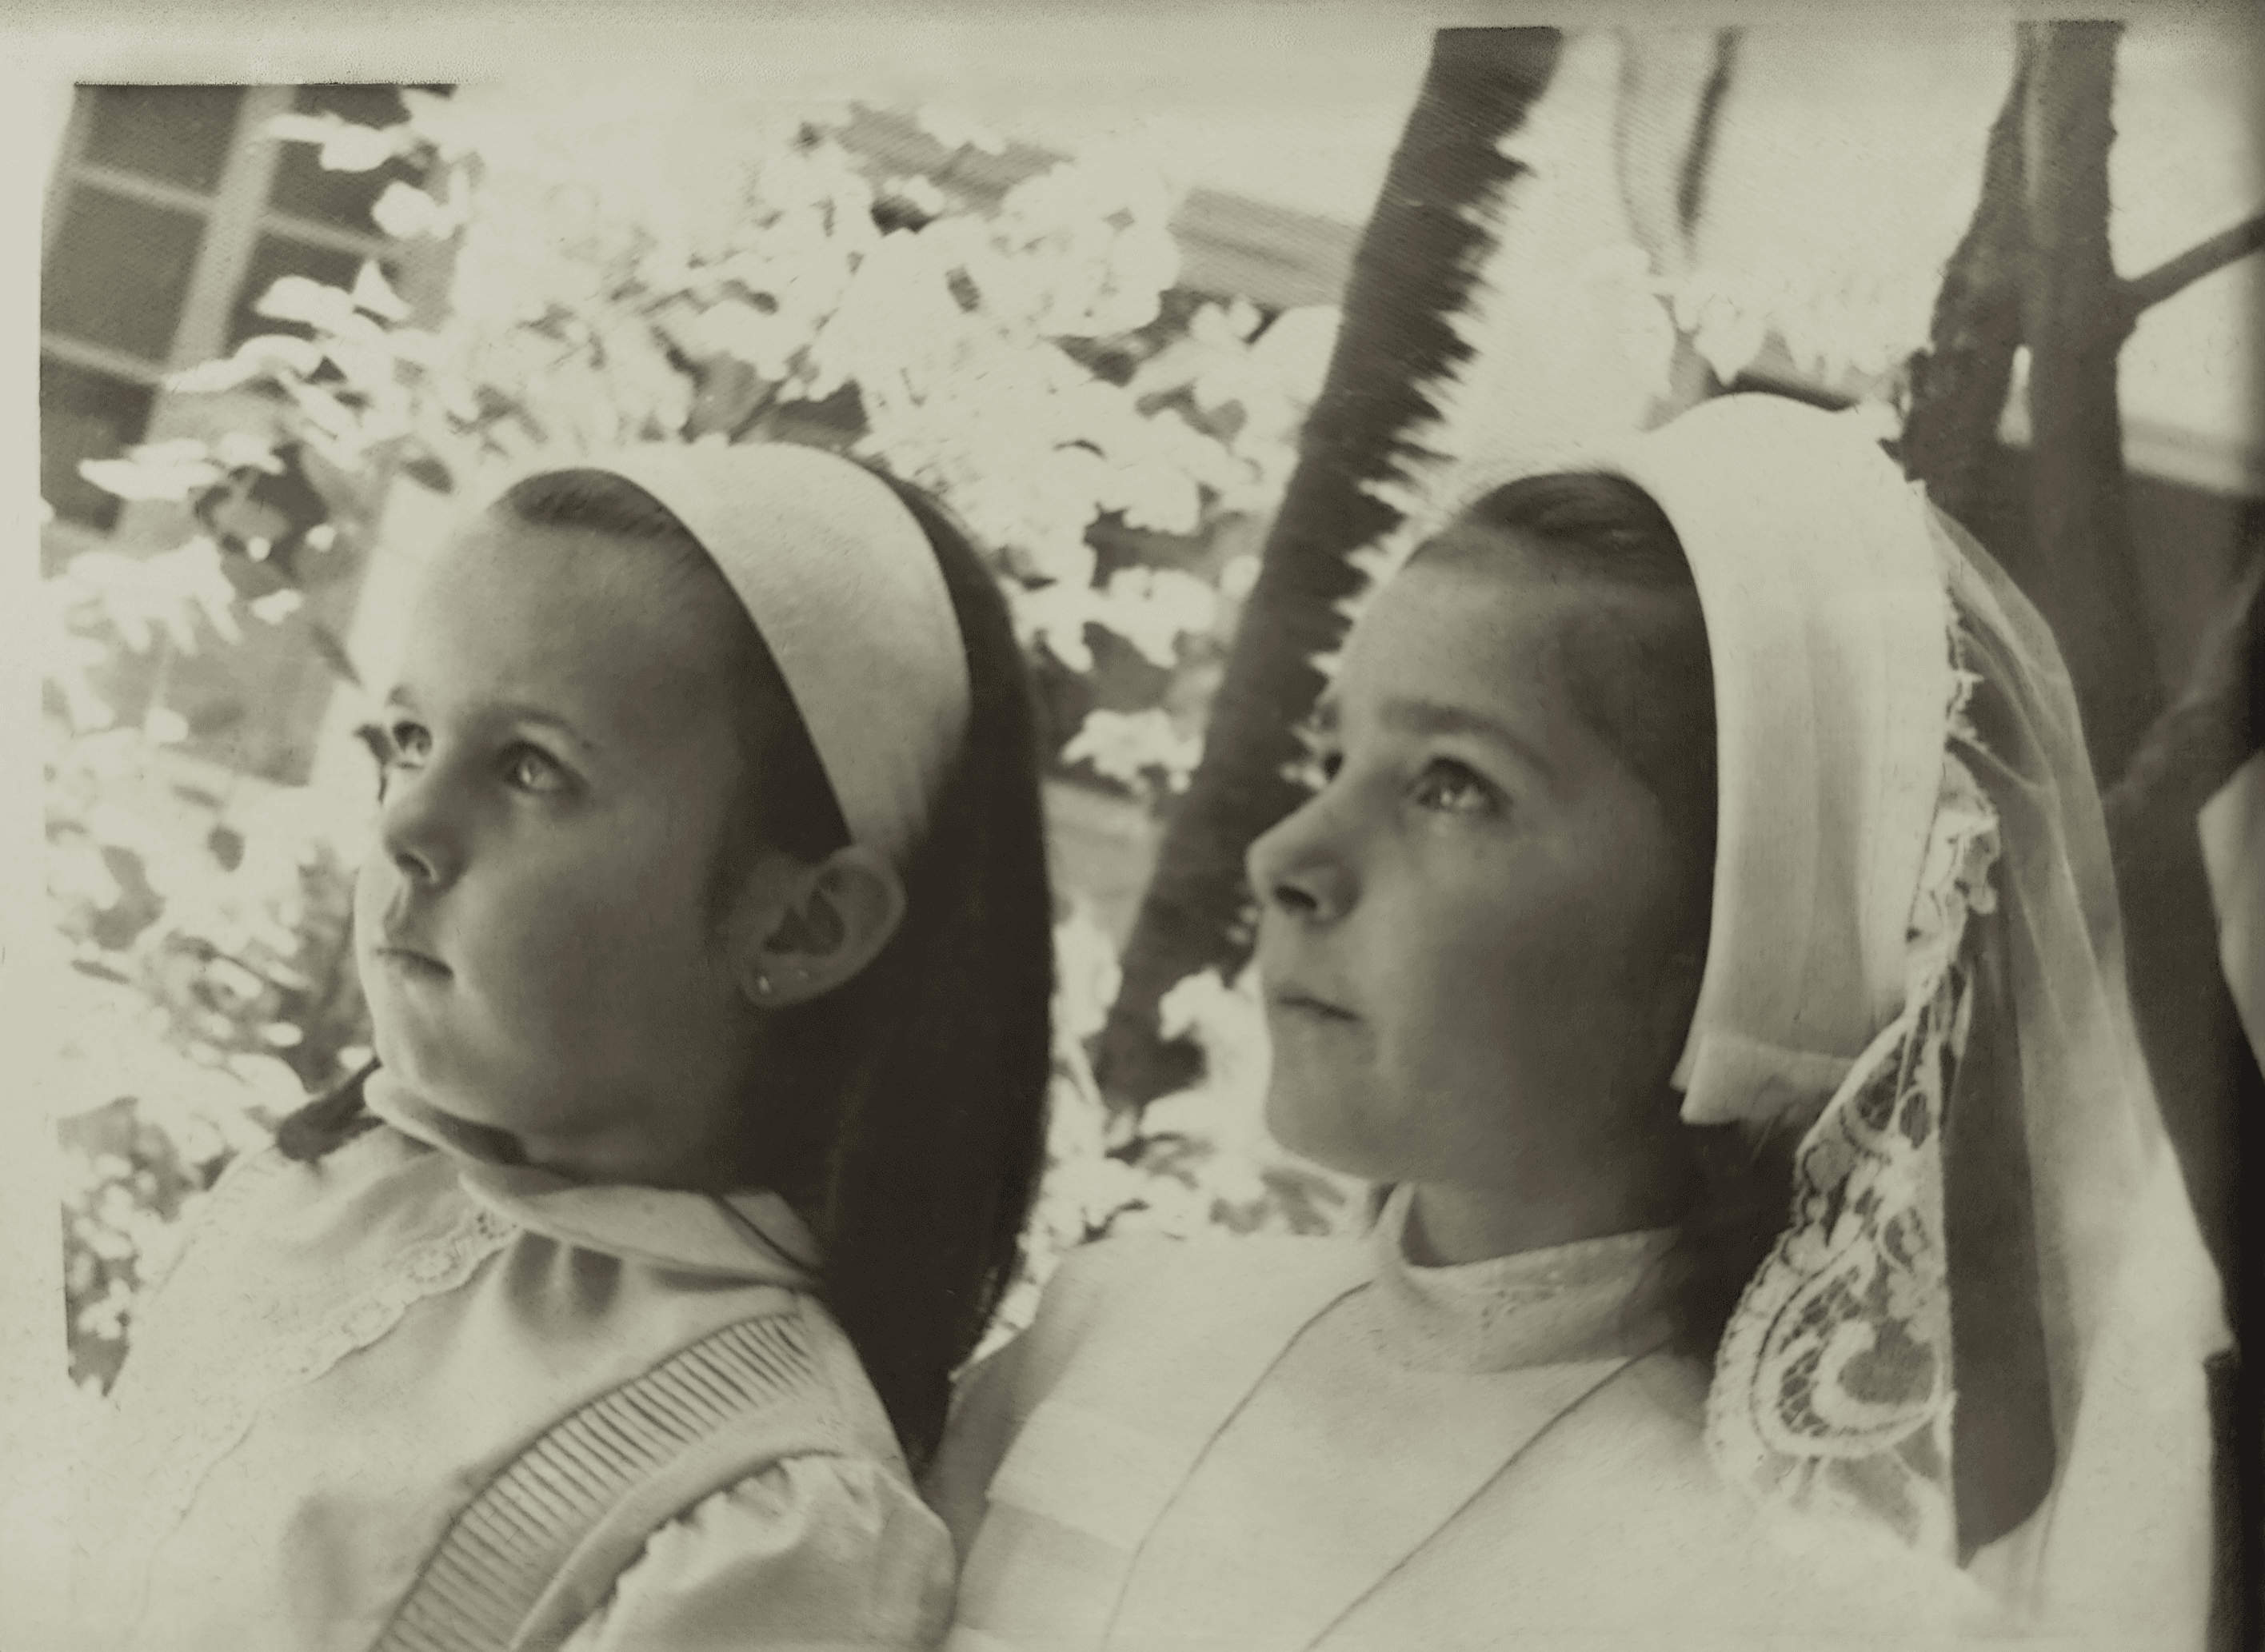
Before: Blurry faces, surface scratches, and crease marks
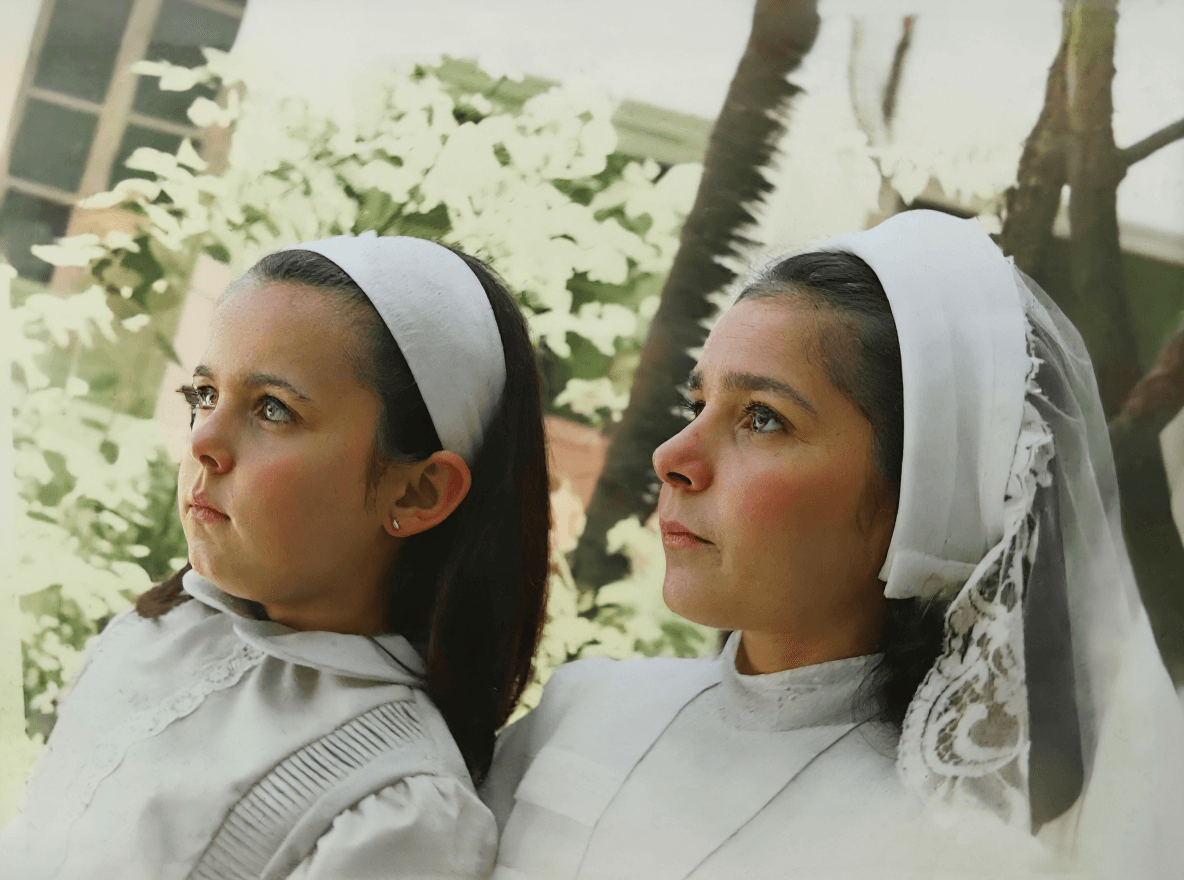
After: Sharp details, scratches gone, faces enhanced
This damaged portrait was restored in under 30 seconds using PixRestorer.
Scanning Tips Before You Restore
To get the most out of AI deblurring and scratch removal, tighten the scan first:
- Start with the highest quality source — A high-resolution scan or original digital file gives the AI more data to reconstruct missing details
- Do not pre-edit the photo — Avoid sharpening or cropping before uploading. The AI works best with the original damage intact
- Scan in color even for black-and-white photos — Color scans capture more tonal information, which helps the AI separate damage from actual image content
- Clean the scanner bed — Dust on the scanner can create artifacts that the AI may interpret as scratches
- Save scans as uncompressed or high-quality JPG — Heavy compression removes fine details that help the AI repair subtle blur
Frequently Asked Questions
Can AI really fix blurry old photos?
Yes. Modern AI models are trained on millions of image pairs and can reconstruct sharp details from blurry inputs. Results are especially strong for faces, text, and recognizable objects. However, extreme blur where no detail exists in the original may have limits.
What is the best way to fix blurry scanned photos?
Start by rescanning the print at a higher DPI, keeping the photo flat on a clean scanner bed, and saving the file with minimal compression. Then run the improved scan through an AI restoration tool. Better input usually matters more than aggressive sharpening.
How well does it remove deep scratches?
This page is mainly about fixing scan blur first. Light surface marks can improve during restoration, but deep physical damage is a secondary issue and should be evaluated after you get a cleaner scan.
What if the photo is blurry and also has edge damage?
Sometimes, but that is not the primary use case of this guide. The stronger win usually comes from fixing blur and scan softness first, then judging whether any missing-edge repair is still needed.
Is it better than Photoshop for photo repair?
For speed and ease of use, absolutely. Photoshop gives you manual control, but repairing a single photo can take an hour or more. PixRestorer handles the same job in under a minute with no learning curve. For professional archivists who need pixel-perfect control, Photoshop may still be preferred.
What if my photo is both blurry and faded?
PixRestorer handles multiple damage types at once. Blur, scratches, fading, color shifts, and tears are all repaired in a single pass. You do not need to run separate tools or steps.
Are my photos kept private?
Yes. Uploaded photos are processed and then automatically deleted from our servers. We do not store, share, or train on your images. See our Privacy Policy for details.
Fix your blurry scanned photos today
Try PixRestorer with 2 free credits. Sharpen soft scans and see whether a cleaner source file is enough before you spend more time retouching.
Start Repairing Now